Description
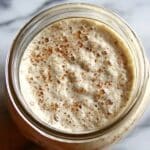
Learn how to create your own natural sourdough starter from scratch using simple ingredients and a step-by-step feeding process. This recipe guides you through fermenting flour and water over seven days to cultivate wild yeast, resulting in a bubbly, tangy starter that’s perfect for baking homemade sourdough bread. With minimal daily effort and basic kitchen tools, anyone can develop a lively starter that enhances flavor and texture in breads.
Ingredients
Scale
Starter Ingredients
- 1 cup (120g) whole wheat flour or unbleached all-purpose flour
- 1/2 cup (120g) filtered or dechlorinated water, room temperature
Instructions
- Day 1 Mixing: In a clean glass jar or container, combine the flour and water. Stir thoroughly until no dry flour remains, scrape down the sides, and loosely cover the container with a lid or cloth. Let this mixture sit at room temperature (70–75°F) for 24 hours to begin fermenting.
- Day 2 Feeding: Check for initial bubbles indicating fermentation. Discard about half of the starter (approximately 1/2 cup). Add 1/2 cup fresh flour and 1/4 to 1/2 cup water to the jar, then mix well. Cover and let rest another 24 hours at room temperature.
- Days 3 to 7 Daily Feedings: Each day, discard half of your starter and add fresh flour and water (maintaining the ratio). You may switch to all-purpose flour after day 3 if you began with whole wheat. Observe your starter as bubbles become more prominent and it develops a pleasantly tangy aroma by day 4 or 5.
- Readiness Check (Days 6–7): By this stage, your starter should double in size within 4–6 hours after feeding and exhibit a light, airy texture. To verify, perform the float test by dropping a small spoonful into water; if it floats, it is active and ready for baking.
Notes
- Always use filtered or dechlorinated water to protect natural yeast from chlorine.
- Store mature sourdough starter in the refrigerator when not baking regularly and feed it weekly to maintain vitality.
- Before baking, feed your starter and allow it to become active and bubbly to ensure optimal rising power in your bread.
- Prep Time: 10 minutes per day for 7 days
- Cook Time: 0 minutes
- Category: Basic, Bread
- Method: Fermentation
- Cuisine: Traditional

