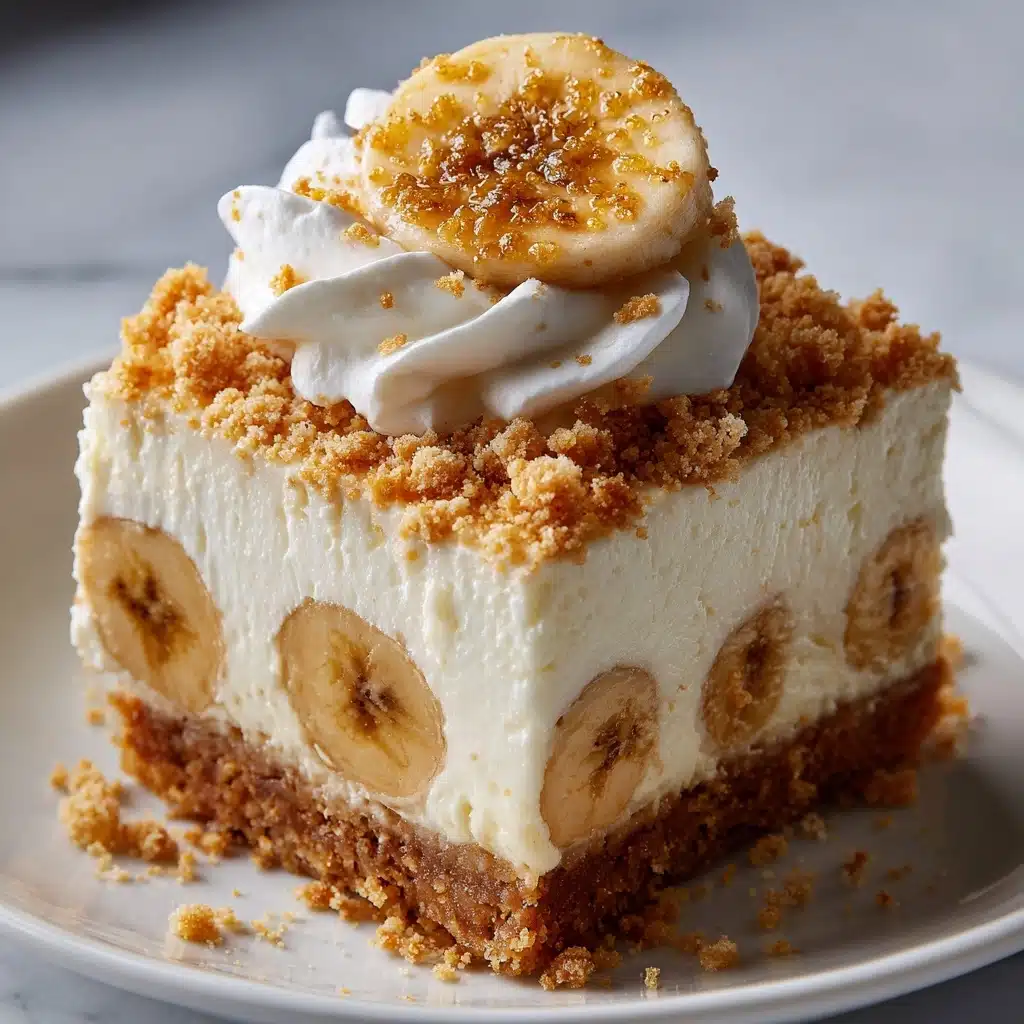
Mini Banana Pudding Cheesecakes Recipe
If you’re searching for a show-stopping treat that’s as fun to make as it is to eat, look no further than Mini Banana Pudding Cheesecakes. These beauties combine the luscious flavor of classic banana pudding with the irresistible creaminess of cheesecake, all wrapped up in perfectly portioned bites. They’re dreamy for parties, potlucks, or just a sweet weeknight indulgence—and the playful size means everyone gets their own little delight.
Ingredients You’ll Need
The magic of Mini Banana Pudding Cheesecakes lies in how a handful of simple, everyday ingredients come together to create something truly special. Each one brings its own wonderful flavor or texture, making every bite a harmony of creamy, crunchy, and sweet.
- Crushed vanilla wafers: These classic cookies set the nostalgic banana pudding vibe and give the crust its buttery crunch.
- Unsalted butter: Melted and mixed into the crumbs, this brings richness and helps the crust hold together.
- Cream cheese: The heart of every great cheesecake, its tangy decadence makes the filling irresistible.
- Granulated sugar: Just the right amount to sweeten things up without overpowering the banana flavor.
- Eggs: These give the filling its silky structure and perfect bite.
- Sour cream: Adds a gorgeous silky texture and a quiet tang that balances the sweetness.
- Vanilla extract: A splash takes the cheesecakes from good to “oh, wow!” in every mouthful.
- Mashed ripe banana: For the truest, most intense banana flavor, use those spotty bananas that are almost too ripe for anything else.
- Salt: Just a pinch sharpens up all the flavors—it’s a quiet hero here.
- Whipped cream or whipped topping: For pillowy, cloud-like crowns on each mini cheesecake.
- Sliced bananas: Fresh, eye-catching, and a double hit of banana goodness.
- Crushed vanilla wafers (for garnish): Adds crunch and ensures everyone knows exactly what inspired these treats.
How to Make Mini Banana Pudding Cheesecakes
Step 1: Prep the Oven and Muffin Tin
Set yourself up for easy cheesecake magic by preheating your oven to 325°F (163°C) and lining a standard muffin tin with paper liners. This not only makes your cheesecakes easy to remove but also keeps things tidy when it comes time to serve—and, honestly, those cupcake wrappers just make everything cuter!
Step 2: Create the Vanilla Wafer Crust
In a small bowl, stir together the crushed vanilla wafers and melted butter until every crumb is glistening and well-coated. Scoop about one heaping tablespoon of this mixture into each muffin cup, then press firmly to form a compact crust layer at the bottom. Give your crust the perfect golden kickstart by baking them for 5 minutes, then set aside to cool slightly. This little toasting step makes all the difference in flavor and texture.
Step 3: Mix the Creamy Banana Cheesecake Filling
Grab a large mixing bowl and beat the cream cheese and sugar together until smooth and luscious—no lumps allowed! Crack in the eggs one at a time, making sure each is incorporated before adding the next. Then mix in the sour cream, vanilla extract, mashed banana, and salt, blending until the filling is silky, creamy, and beautifully scented with banana. The mixture should be dreamy and pourable—if you sneak a little taste, I won’t tell.
Step 4: Assemble and Bake
Divide the banana cheesecake filling among your prepared muffin cups, scooping nearly to the top for generous mini cheesecakes. Into the oven they go for 18 to 22 minutes, just until the centers look set but still have the faintest wobble in the middle. Let them cool in the pan for about 10 minutes, then transfer to a wire rack to finish cooling completely. Don’t skip the chilling—pop them in the fridge for at least 2 hours, which gives them that perfectly firm and creamy texture we all dream of.
Step 5: Add the Finishing Touches
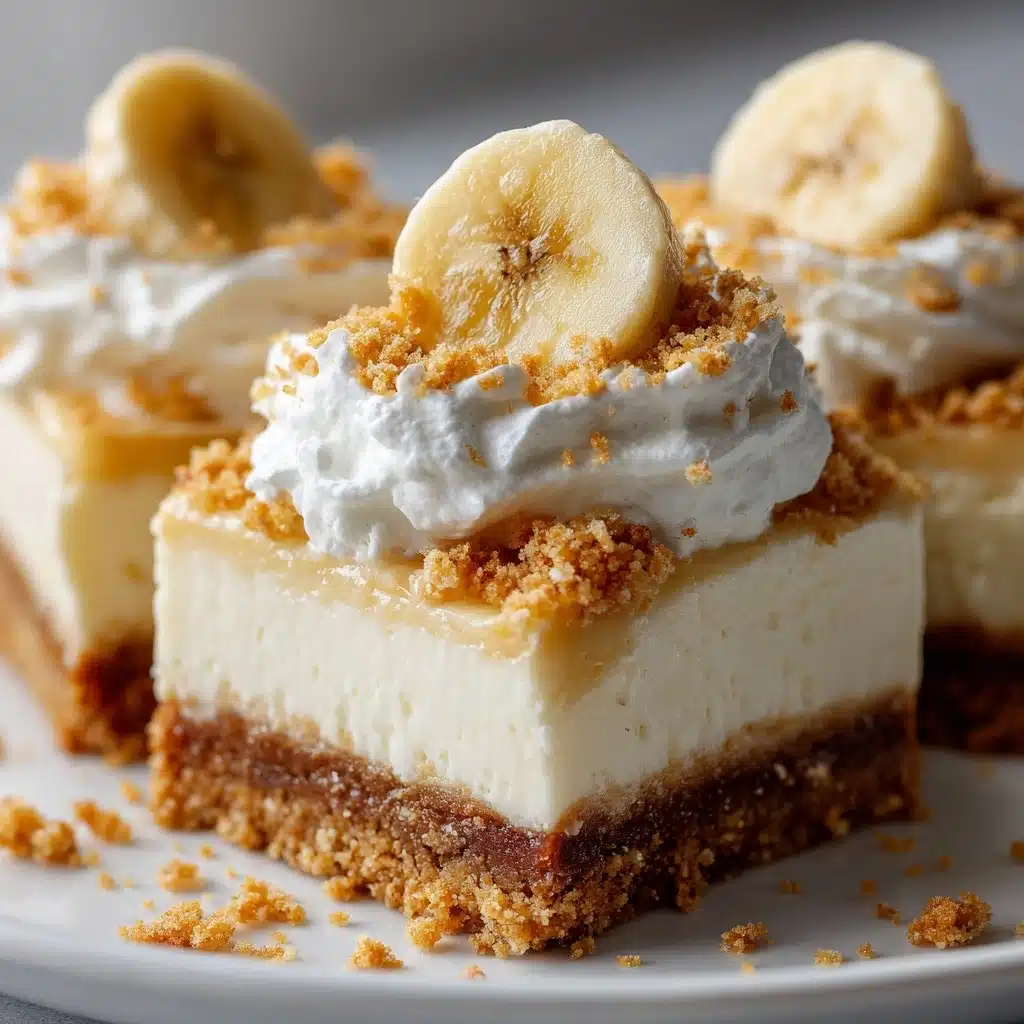
Once fully chilled, the real fun begins! Top each mini cheesecake with a swirl of whipped cream, a slice of fresh banana, and a scatter of crushed vanilla wafers. Stand back and admire your handiwork—then dig in and savor every blissful bite.
How to Serve Mini Banana Pudding Cheesecakes
Garnishes
Elevate your Mini Banana Pudding Cheesecakes to irresistible status with a fluffy cloud of whipped cream, a cheerful banana slice perched on top, and a sprinkle of vanilla wafer crumbles for a bit of nostalgic crunch. If you want to go all out, a tiny mint leaf or a dusting of cinnamon adds extra color and aroma.
Side Dishes
While these cheesecakes absolutely shine on their own, you can pair them with a bowl of fresh berries for a pop of color or some lightly sweetened iced tea for a Southern-inspired dessert moment. For parties or buffet tables, they snuggle up wonderfully with lemon bars or mini fruit tarts as part of a bite-sized dessert spread.
Creative Ways to Present
Place each Mini Banana Pudding Cheesecake on a small platter with extra vanilla wafers scattered around for a playful effect. For showers or birthdays, dress them up with colorful cupcake wrappers or place each cheesecake in a mini mason jar for a modern, portable twist. You could even set up a DIY cheesecake station with various toppings so your guests can customize to their hearts’ content!
Make Ahead and Storage
Storing Leftovers
Store any remaining cheesecakes in an airtight container in the refrigerator. They’ll stay fresh and creamy for up to 3 days. Just hold off on adding the banana slices on top until right before serving so they stay bright and fresh.
Freezing
Mini Banana Pudding Cheesecakes freeze beautifully! Before topping them, wrap each one tightly in plastic wrap and then place in a freezer-safe container. They’ll keep for up to 2 months. Thaw overnight in the fridge and add the whipped cream and banana garnish right before serving for that fresh-from-the-oven taste.
Reheating
Since these are meant to be enjoyed chilled, you don’t need to reheat them. However, if you find they’re a little too firm straight from the freezer, let them sit at room temperature for about 15 minutes before adding the garnish and serving. This brings them back to their creamy perfection!
FAQs
Can I make Mini Banana Pudding Cheesecakes ahead of time?
Absolutely! These are the ultimate make-ahead dessert. You can bake and chill them a day or even two in advance, which actually helps the flavors develop. Just remember to add the banana slices and whipped cream right before serving.
What’s the best way to crush vanilla wafers for the crust?
A food processor works fastest, but if you’re in a pinch, pop the wafers in a zip-top bag and crush them with a rolling pin or the bottom of a sturdy glass. Aim for fine crumbs for a compact, sturdy crust.
How can I get an extra strong banana flavor?
For even more banana punch, you can add a couple drops of banana extract to the filling alongside the mashed banana. The key is using super ripe (almost black) bananas for the deepest natural flavor.
Can I use low-fat cream cheese or a dairy-free alternative?
Full-fat cream cheese yields the creamiest, most indulgent texture, but you can substitute low-fat or a dairy-free cream cheese if you prefer. The flavor and texture may change a bit, but your Mini Banana Pudding Cheesecakes will still be delicious!
What if I don’t have a muffin tin?
No worries! You can use mini ramekins or silicone baking cups placed on a baking tray as an alternative. Just be sure each serving is about the same size so they bake evenly.
Final Thoughts
There’s just something magical about the combination of nostalgia, sweetness, and creamy decadence that Mini Banana Pudding Cheesecakes deliver in every single bite. Whether you’re treating yourself or sharing with friends, these mini desserts are pure joy—so definitely give them a try and watch them disappear faster than you can say “banana pudding”!
Print
Mini Banana Pudding Cheesecakes Recipe
- Total Time: 40 minutes plus chilling
- Yield: 12 mini cheesecakes 1x
- Diet: Vegetarian
Description
Indulge in the delightful combination of banana pudding and cheesecake with these mini treats. Creamy, flavorful, and perfectly portioned, they’re a hit for any occasion.
Ingredients
For the Crust:
- 1 cup crushed vanilla wafers
- 3 tablespoons unsalted butter, melted
For the Filling:
- 16 oz cream cheese, softened
- 1/2 cup granulated sugar
- 2 large eggs
- 1/4 cup sour cream
- 1 teaspoon vanilla extract
- 1/2 cup mashed ripe banana (about 1 medium banana)
- 1/4 teaspoon salt
For the Topping:
- 1 cup whipped cream or whipped topping
- sliced bananas
- crushed vanilla wafers for garnish
Instructions
- Preheat the oven: Preheat the oven to 325°F (163°C) and line a 12-cup muffin tin with paper liners.
- Prepare the crust: Mix crushed vanilla wafers and melted butter. Press into muffin cups and bake briefly.
- Make the filling: Beat cream cheese and sugar, add eggs, sour cream, vanilla, mashed banana, and salt. Mix until creamy.
- Fill and bake: Divide filling among muffin cups and bake until set. Cool, then chill.
- Top and serve: Add whipped cream, banana slice, and crushed wafers before serving.
Notes
- Use very ripe bananas for the best flavor.
- Cheesecakes can be made a day ahead and stored chilled.
- Add a touch of banana extract for a stronger banana flavor, if desired.
- Prep Time: 20 minutes
- Cook Time: 20 minutes
- Category: Dessert
- Method: Baking
- Cuisine: American
Nutrition
- Serving Size: 1 mini cheesecake
- Calories: 230
- Sugar: 13g
- Sodium: 160mg
- Fat: 16g
- Saturated Fat: 9g
- Unsaturated Fat: 6g
- Trans Fat: 0g
- Carbohydrates: 17g
- Fiber: 1g
- Protein: 4g
- Cholesterol: 65mg


