Fruity Pebbles Cookie Cheesecake Bars Recipe
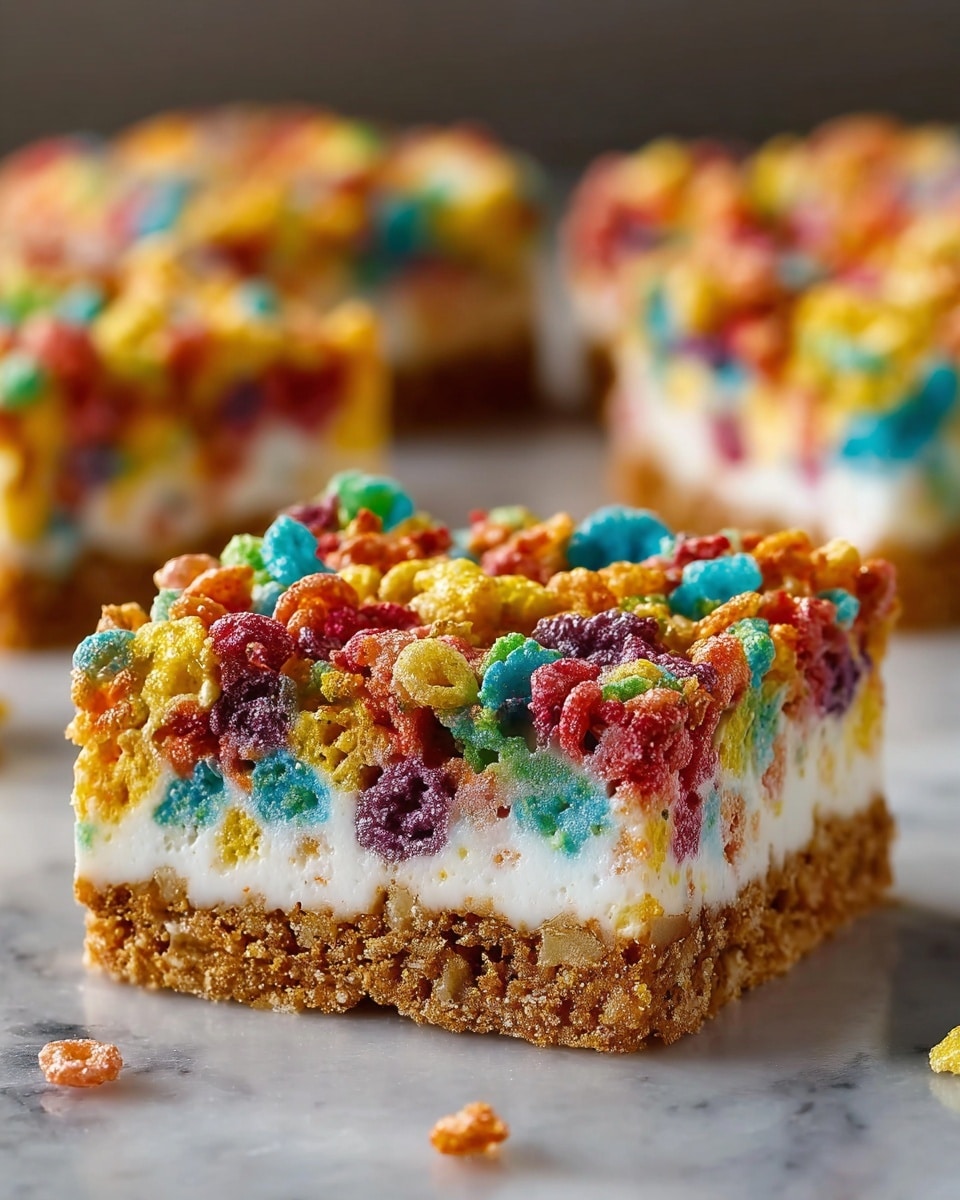
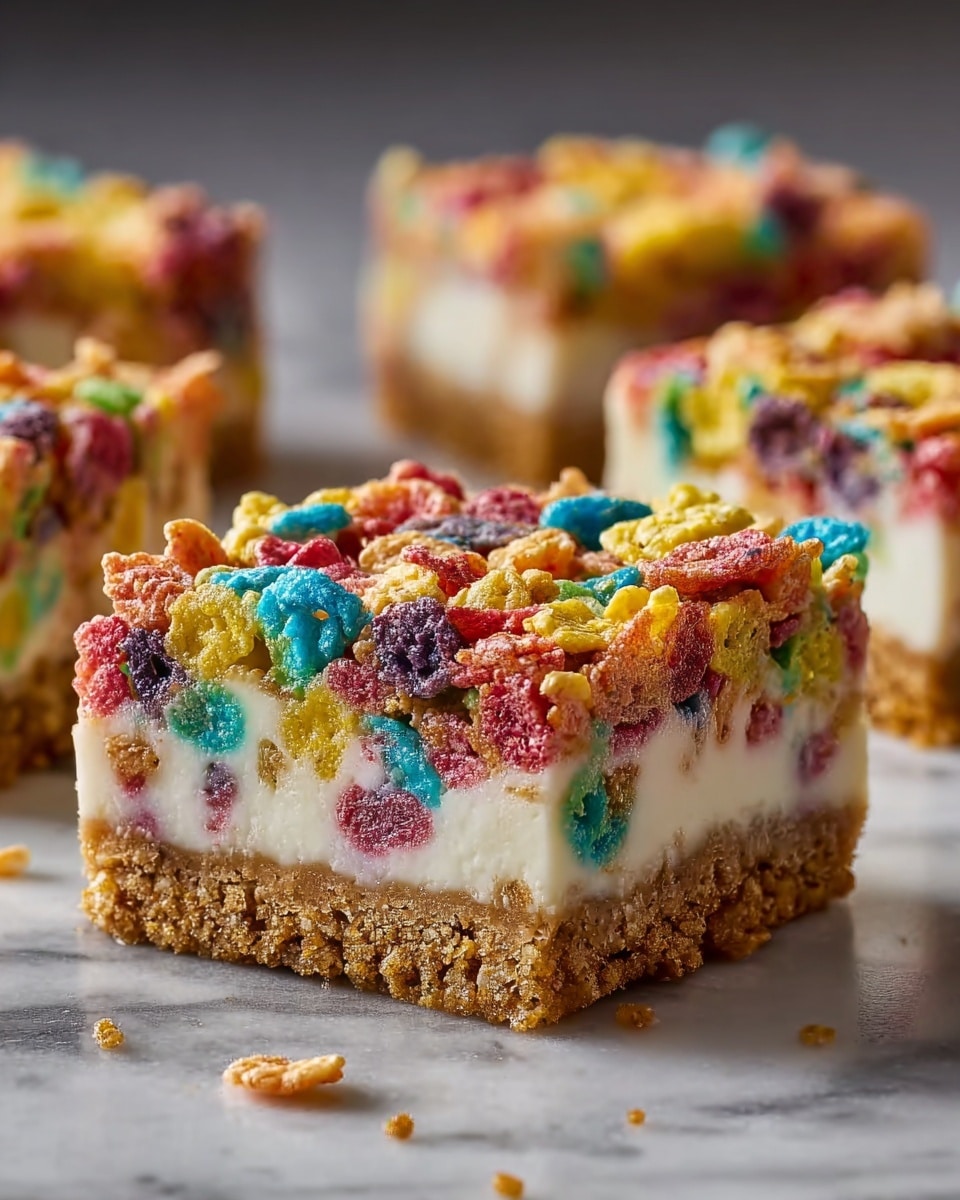
If you’re on the hunt for a dessert that combines nostalgia, creamy indulgence, and a burst of colorful crunch, the Fruity Pebbles Cookie Cheesecake Bars Recipe is an absolute must-try. This delightful treat starts with a buttery sugar cookie base, topped with a luscious, velvety cheesecake layer, and finished with a generous sprinkle of vibrant Fruity Pebbles cereal. Each bite is a joyful celebration of textures and flavors that feels like your favorite childhood breakfast and after-dinner dessert all wrapped into one bar. Trust me, once you make these bars, they’ll quickly become your go-to for parties, family gatherings, or just a special weekend treat.
Ingredients You’ll Need
Getting ready to whip up these Fruity Pebbles Cookie Cheesecake Bars couldn’t be easier. Each ingredient plays a vital role in ensuring the perfect balance of chewy, creamy, and crunchy textures along with a pop of bright color and flavor.
- Refrigerated sugar cookie dough (16.5 oz): Provides a soft, buttery crust that holds everything together beautifully.
- Fruity Pebbles cereal (1 1/2 cups, divided): Adds irresistible fruit-flavored crunch and vibrant hues.
- Cream cheese (8 oz, softened): The star of the cheesecake layer, delivering that creamy tangy richness.
- Granulated sugar (1/3 cup): Sweetens the cheesecake filling just right without overpowering it.
- Large egg (1): Binds the cheesecake mixture for a smooth, sliceable texture.
- Vanilla extract (1/2 teaspoon): Enhances the overall flavor with a subtle warm note.
- Pinch of salt: Balances sweetness and brightens flavors.
How to Make Fruity Pebbles Cookie Cheesecake Bars Recipe
Step 1: Prepare the Crust
Start by preheating your oven to 350°F (175°C) and lining an 8×8-inch baking pan with parchment paper for easy removal later. Press the refrigerated sugar cookie dough evenly into the bottom of the pan, creating a smooth base. Then, sprinkle half a cup of Fruity Pebbles cereal on top and gently press them into the dough. Pop this into the oven and bake for about 10 minutes, just enough to set the crust but not fully cook it.
Step 2: Make the Cheesecake Filling
While your crust is baking, grab a mixing bowl and beat the softened cream cheese together with granulated sugar until the mixture is silky smooth. Add in the egg, vanilla extract, and a pinch of salt, and continue mixing until everything is fully incorporated and creamy. This luscious filling will be the heart of your Fruity Pebbles Cookie Cheesecake Bars Recipe.
Step 3: Assemble and Bake
Once the crust comes out of the oven, pour the cheesecake filling over the warm cookie base and spread it evenly for a level top. Sprinkle the remaining cup of Fruity Pebbles cereal generously across the surface. Bake the entire pan for 20 to 25 minutes or until the cheesecake is set and the edges turn a gentle golden brown.
Step 4: Chill and Slice
After baking, let the bars cool completely at room temperature. Then, transfer your pan to the refrigerator for at least 2 hours. Chilling is crucial—it helps the cheesecake layer firm up so your bars slice cleanly without crumbling. Once chilled, cut into squares and get ready to enjoy a slice of heaven.
How to Serve Fruity Pebbles Cookie Cheesecake Bars Recipe
Garnishes
These bars are vibrant enough on their own, but you can dress them up with a few fun garnishes. Try a light dusting of powdered sugar for an elegant touch, or add dollops of whipped cream for extra creaminess. Fresh berries like strawberries or raspberries can add a fresh tart contrast to the sweet bars. Even a drizzle of white chocolate or a sprinkle of extra Fruity Pebbles can amp up their playful look.
Side Dishes
Because these bars are rich and sweet, pairing them with something lighter or refreshing works beautifully. Serve alongside a scoop of vanilla bean ice cream or a cold glass of milk to complement the creamy texture. For a brunch or tea party, think about serving with fresh fruit salad or simple lemon water to balance the decadence.
Creative Ways to Present
Want to impress your guests? Arrange these bars on a colorful dessert platter with edible flowers or place them in individual mini cupcake liners for easy serving. For a fun twist, try layering crushed bars into parfait glasses with whipped cream or yogurt for a whimsical and delicious dessert cup. These presentation ideas make the Fruity Pebbles Cookie Cheesecake Bars Recipe perfect for any occasion.
Make Ahead and Storage
Storing Leftovers
Store any leftover bars in an airtight container in the refrigerator. They’ll keep well for up to 4 days, maintaining their creamy texture and crunchy topping. Just be sure to cover them well so they don’t absorb any fridge odors.
Freezing
If you want to save these bars for later, go ahead and freeze them. Wrap individual slices tightly in plastic wrap and then place them in a freezer-safe container or bag. They’ll stay fresh for up to 2 months. When you’re ready to indulge, thaw them overnight in the fridge.
Reheating
Because these bars taste best chilled, reheating isn’t necessary. However, if you prefer them slightly warm, let them sit at room temperature for about 15 minutes before serving to soften just a touch, but avoid microwaving as it can affect the texture.
FAQs
Can I use homemade sugar cookie dough instead of store-bought?
Absolutely! Homemade sugar cookie dough works wonderfully and adds a personal touch, just make sure it’s not too sticky so you can press it evenly into the pan.
Is there a gluten-free version of this recipe?
Yes, to make gluten-free Fruity Pebbles Cookie Cheesecake Bars Recipe, swap the sugar cookie dough and Fruity Pebbles for gluten-free alternatives. Be mindful to check that the cereal is certified gluten-free as well.
How do I know when the cheesecake layer is done baking?
The cheesecake is ready when the edges look set and slightly golden while the center still has a tiny bit of jiggle. It will firm up more as it cools and chills.
Can I use other cereals instead of Fruity Pebbles?
You can experiment with other colorful, crunchy cereals like Trix or Captain Crunch for fun variations, but Fruity Pebbles really give the best flavor and nostalgic effect.
How should I cut the bars to keep the topping intact?
Use a sharp, clean knife and wipe it between cuts to make neat slices without dragging the crunchy topping apart.
Final Thoughts
There’s something truly magical about the Fruity Pebbles Cookie Cheesecake Bars Recipe—it brings together childhood memories and adult indulgence in one colorful, creamy bite. Whether you’re feeding a crowd or treating yourself, these bars will not disappoint. Go on and give this recipe a whirl; I promise it will become one of your sweet favorites in no time!
Print
Fruity Pebbles Cookie Cheesecake Bars Recipe
- Total Time: 2 hours 55 minutes
- Yield: 16 bars 1x
Description
These Fruity Pebbles Cookie Cheesecake Bars combine a buttery sugar cookie crust with a creamy cheesecake layer and a colorful, crunchy Fruity Pebbles cereal topping. This vibrant and playful treat is perfect for parties, dessert tables, or a fun twist on classic cheesecake bars. The recipe is simple, quick to prepare, and guaranteed to be a viral hit with sweet tooth enthusiasts of all ages.
Ingredients
Cookie Crust
- 1 package (16.5 oz) refrigerated sugar cookie dough
- 1/2 cup Fruity Pebbles cereal
Cheesecake Filling
- 8 oz cream cheese, softened
- 1/3 cup granulated sugar
- 1 large egg
- 1/2 teaspoon vanilla extract
- Pinch of salt
Topping
- 1 cup Fruity Pebbles cereal
Instructions
- Preheat Oven and Prepare Pan: Preheat your oven to 350°F (175°C). Line an 8×8-inch baking pan with parchment paper to prevent sticking and allow easy removal.
- Form Cookie Crust: Press the refrigerated sugar cookie dough evenly into the bottom of the prepared pan, creating a uniform crust layer. Sprinkle 1/2 cup of Fruity Pebbles cereal over the cookie dough and gently press them in so they adhere well. Bake this crust for 10 minutes until slightly set but not fully browned.
- Make Cheesecake Filling: While the crust bakes, beat together the softened cream cheese, granulated sugar, egg, vanilla extract, and a pinch of salt until the mixture is smooth and creamy with no lumps.
- Add Cheesecake Layer: Remove the partially baked cookie crust from the oven. Pour the prepared cheesecake filling evenly over the crust and gently smooth the top using a spatula to create an even layer.
- Top with Fruity Pebbles: Sprinkle the remaining 1 cup of Fruity Pebbles cereal evenly over the cheesecake filling, adding a bright, crunchy texture to the bars.
- Bake the Bars: Return the pan to the oven and bake for 20 to 25 minutes, or until the center of the cheesecake layer is set and the edges are lightly golden. Avoid overbaking to keep the bars moist and creamy.
- Cool and Chill: Allow the bars to cool completely at room temperature. Then refrigerate them for at least 2 hours to let the cheesecake set fully before slicing into 16 bars and serving.
Notes
- Ensure the cream cheese is softened to room temperature for a smooth cheesecake mixture without lumps.
- Use parchment paper to line the pan for easy removal and cleaner slicing.
- Do not overbake the cheesecake layer to keep it creamy and prevent cracking.
- Allow the bars to chill thoroughly as this helps the cheesecake layer firm up for cleaner cuts.
- You can substitute Fruity Pebbles with another colorful cereal for variation.
- Prep Time: 20 minutes
- Cook Time: 35 minutes
- Category: Dessert
- Method: Baking
- Cuisine: American
