Cotton Cake Recipe
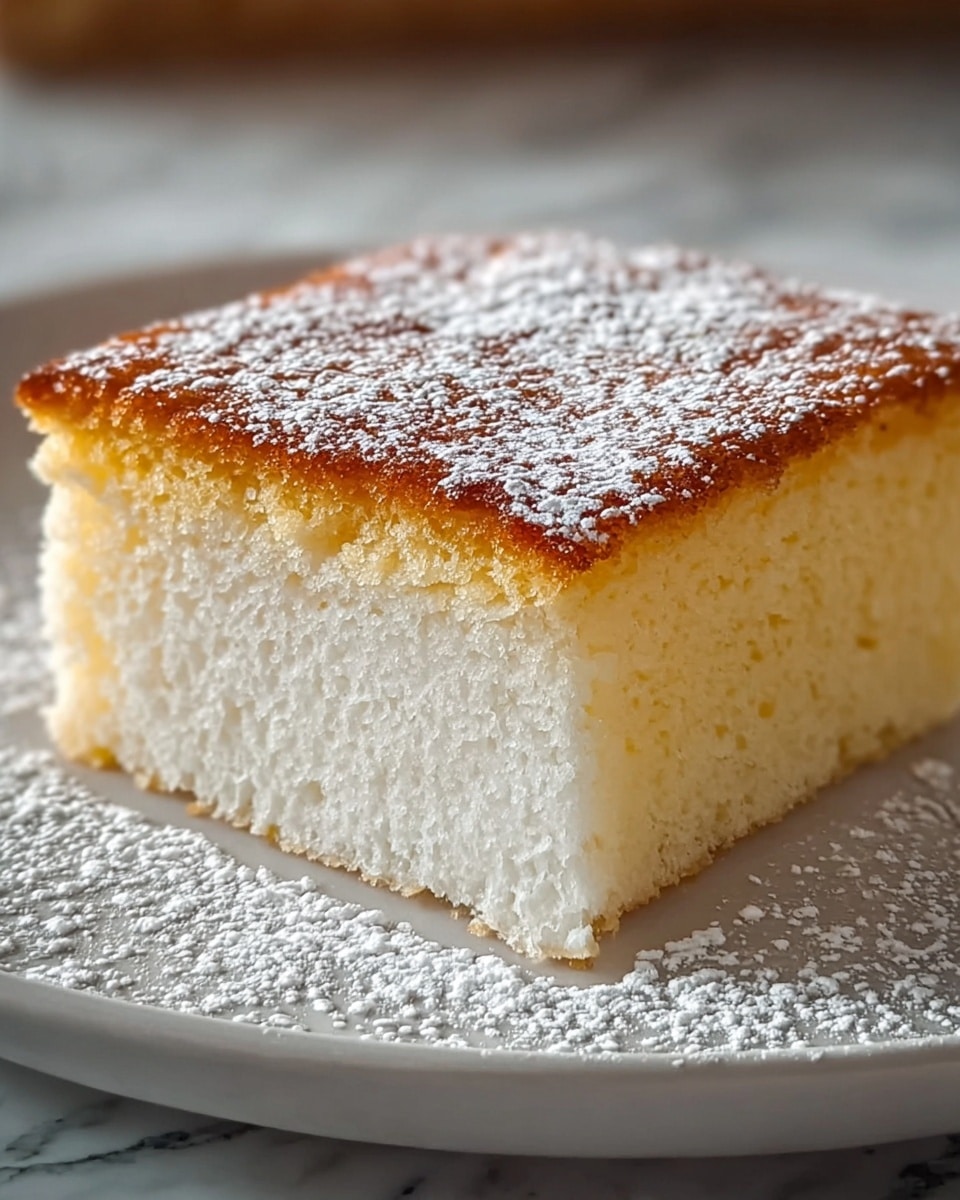
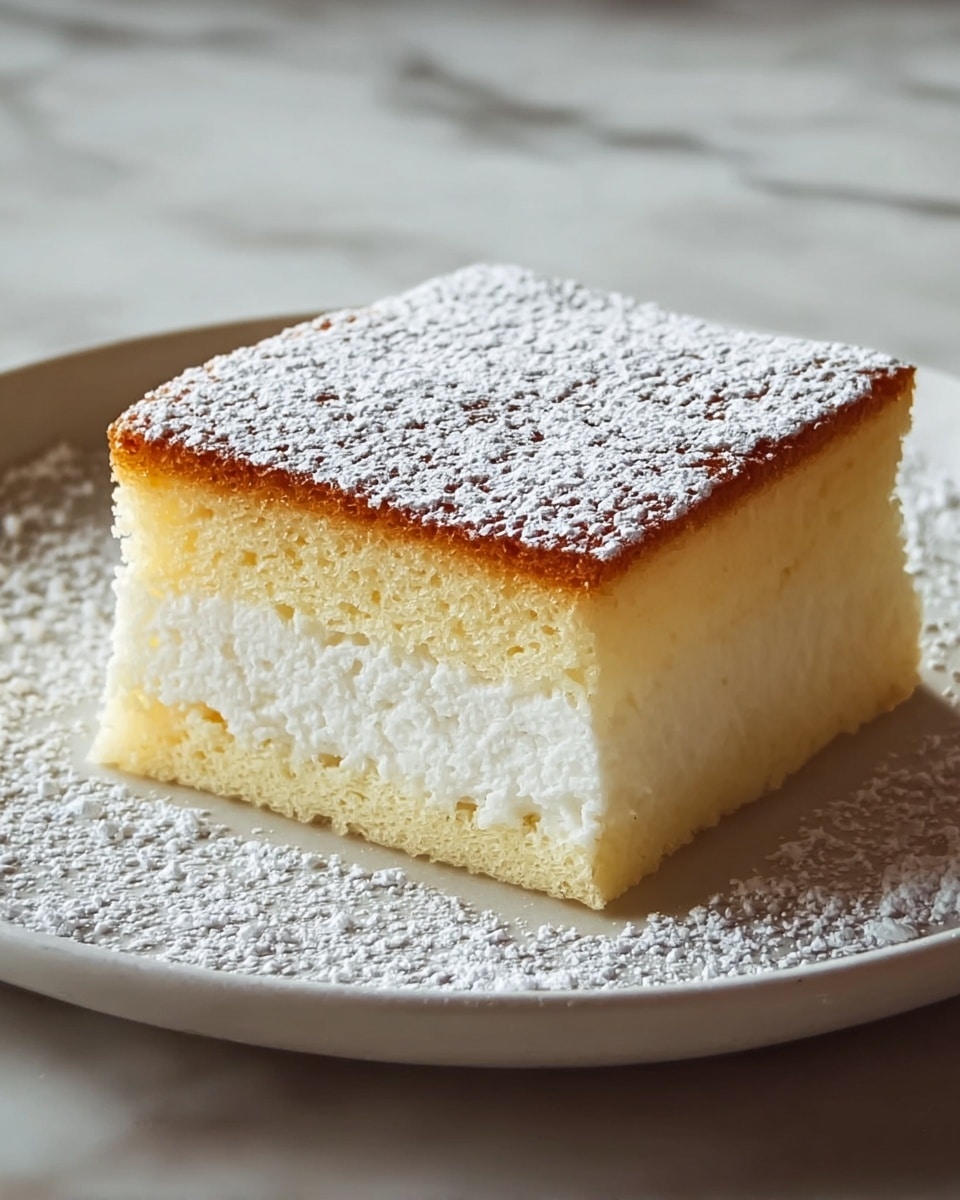
If you have a soft spot for light, fluffy desserts that melt like a dream, then you are going to adore this Cotton Cake Recipe. This cake is the perfect balance of airy texture and rich flavor, combining cream cheese, eggs, and just the right amount of sugar to create a delicately tender treat. Every bite feels like a cloud of sweetness, making it an absolute favorite whenever you want to impress guests or simply savor a special homemade delight. The magic lies in its simple ingredients and careful technique, which come together to form a cake that’s as beautiful as it is delicious.

Ingredients You’ll Need
Gathering the right ingredients is essential for this Cotton Cake Recipe. Each component plays a vital role in the cake’s texture and flavor, from the creaminess of the cream cheese to the fluffiness provided by perfectly whipped egg whites.
- Cream cheese (1/2 cup, softened): Adds a smooth, tangy richness that makes the cake extra moist and tender.
- Whole milk (1/2 cup): Balances moisture and helps create a light batter.
- Unsalted butter (1/4 cup): Provides a subtle buttery flavor and enhances softness.
- Vanilla extract (1 teaspoon): Brings out the cake’s natural sweetness and aroma.
- All-purpose flour (1/2 cup): The structural base that gives the cake its shape without weighing it down.
- Cornstarch (1/4 cup): Adds tenderness and a finer crumb for that melt-in-your-mouth texture.
- Salt (1/4 teaspoon): Balances sweetness and enhances overall flavor.
- Large eggs (5, separated): Key to creating the cake’s signature lightness with yolks adding richness and whites providing airiness.
- Granulated sugar (1/2 cup for yolks, 1/4 cup for whites): Sweetens and stabilizes the egg mixtures for perfect lift.
- Powdered sugar (optional, for dusting): Adds a pretty finishing touch when serving.
How to Make Cotton Cake Recipe
Step 1: Preheat Your Oven and Prepare Pan
Start by setting your oven to 320°F (160°C) so it’s perfectly hot when your batter is ready. Line the bottom of an 8-inch round cake pan with parchment paper to prevent sticking, and lightly grease the sides if you prefer an easier release after baking.
Step 2: Create the Cream Cheese Mixture
In a small saucepan, melt your softened cream cheese, butter, and milk over low heat until smooth and combined. This mixture forms the luscious base of your cake’s texture. Remove from heat and stir in vanilla extract, then let it cool slightly—to avoid cooking your eggs prematurely when you mix later.
Step 3: Combine Dry Ingredients
Next, sift together the all-purpose flour, cornstarch, and salt. This ensures there are no lumps and that these dry ingredients integrate smoothly into your cream cheese base, lending the cake a delicate crumb.
Step 4: Mix Dry Ingredients into Cream Cheese Base
Gradually add the sifted dry mixture to your cream cheese blend, stirring gently until you have a silky, lump-free batter that promises a tender crumb.
Step 5: Whisk the Egg Yolks with Sugar
In a separate bowl, beat the egg yolks with half a cup of granulated sugar until the mixture turns pale and smooth. This step helps to build volume and sweetness that will enrich the cake.
Step 6: Incorporate Yolk Mixture into Batter
Carefully fold the egg yolk mixture into the cream cheese batter, ensuring it blends evenly without deflating all the air you’re working to lock in.
Step 7: Beat Egg Whites to Stiff Peaks
Using a clean bowl and an electric mixer, whisk the egg whites with the remaining quarter cup of sugar. Start at medium speed until soft peaks form, then increase speed until stiff peaks hold—this will make your cake incredibly light and fluffy.
Step 8: Gently Fold in Egg Whites
In batches, fold the whipped egg whites into your batter with a spatula. Take your time and use gentle, circular folding motions to keep all that precious air trapped inside your mix.
Step 9: Prepare and Bake in a Water Bath
Pour your batter into the prepared pan, tap it lightly on your counter to release air bubbles, then place the cake pan inside a larger baking dish. Fill the outer dish with hot water halfway up the sides of the cake pan; this water bath ensures even cooking and helps prevent cracks.
Step 10: Bake and Cool
Bake for 60 to 70 minutes until the top is a lovely golden color and the center is just set but still slightly jiggly. Turn off your oven and leave the cake inside for 15 minutes with the door slightly ajar—this gradual cooling keeps your cotton cake from sinking. Then cool completely on a wire rack and refrigerate for at least 3 hours or overnight to set perfectly.
Step 11: Serve and Enjoy
Before slicing, dust the cake with powdered sugar if desired, adding a delicate finish to this soft, cloudlike treat.
How to Serve Cotton Cake Recipe

Garnishes
Simple garnishes work best to enhance this cake’s delicate flavor. A light dusting of powdered sugar is classic, or you can sprinkle edible flower petals for a whimsical touch. Fresh berries or a drizzle of honey pairs beautifully too, adding a burst of natural sweetness and color.
Side Dishes
To complement your cotton cake, serve alongside fresh fruit compote, a dollop of whipped cream, or a scoop of vanilla ice cream. These sides bring freshness and creaminess that highlight the cake’s soft texture perfectly without overpowering it.
Creative Ways to Present
Try serving your cotton cake recipe in individual ramekins or mason jars for charming personal portions. For celebrations, layer in a trifle with fresh fruit and whipped cream. You can also turn it into a tea-time treat by cutting small cubes and skewering them with fruit and marshmallows for a fun dessert kabob.
Make Ahead and Storage
Storing Leftovers
Leftover cotton cake stays wonderfully fresh when stored in an airtight container in the refrigerator for up to three days. The chilling actually helps maintain its moist, fluffy consistency.
Freezing
You can freeze the cake wrapped tightly in plastic wrap and then in foil for up to one month. Thaw overnight in the refrigerator before serving to preserve its light texture.
Reheating
When ready to enjoy, warm slices gently in the microwave for 10 to 15 seconds or at low power in the oven—just enough to bring back that soft, fluffy feeling without drying out the cake.
FAQs
Can I use low-fat cream cheese for this recipe?
Low-fat cream cheese can be used, but it might slightly affect the cake’s richness and texture. For the best cotton cake experience, full-fat cream cheese is recommended to achieve that signature moist and creamy crumb.
Why do I need to bake the cake in a water bath?
The water bath provides gentle and even heat around the cake pan, preventing cracks and ensuring the cake cooks slowly without drying out. It’s key to that flawless “cotton” softness.
Can I make this recipe gluten-free?
You can substitute the all-purpose flour with a gluten-free flour blend that includes a bit of xanthan gum. However, texture may vary slightly since gluten contributes to the cake’s structure.
Is it necessary to separate the eggs?
Yes, separating the eggs is crucial. Whipping the egg whites separately creates the airiness that defines this cotton cake recipe, making it light and fluffy rather than dense.
How do I prevent the cake from collapsing after baking?
Allow the cake to cool gradually by leaving it in the oven with the door slightly open and refrigerate it for several hours after baking. This slow cooling helps the cake set completely and maintain its airy structure.
Final Thoughts
Once you try this Cotton Cake Recipe, it’s likely to become a cherished staple in your baking repertoire. Its light, cloud-like texture paired with a subtle, creamy flavor makes it perfect for any occasion or just a sweet treat anytime. Whip up this delightful cake to share with loved ones and watch it disappear quickly – it’s simply irresistible!
Print
Cotton Cake Recipe
- Total Time: 1 hour 35 minutes
- Yield: 8 servings 1x
- Diet: Vegetarian
Description
This airy and delicate Cotton Cake is a light Japanese-style cheesecake that combines the richness of cream cheese with a soft, fluffy texture. Baked in a water bath to ensure tenderness and prevent cracking, this cake offers a subtle sweetness balanced by a creamy vanilla flavor, perfect for an elegant dessert or afternoon treat.
Ingredients
Wet Ingredients
- 1/2 cup cream cheese (softened)
- 1/2 cup whole milk
- 1/4 cup unsalted butter
- 1 teaspoon vanilla extract
- 5 large eggs (separated yolks and whites)
Dry Ingredients
- 1/2 cup all-purpose flour
- 1/4 cup cornstarch
- 1/4 teaspoon salt
- 1/2 cup granulated sugar (for yolk mixture)
- 1/4 cup granulated sugar (for egg whites)
Topping
- Powdered sugar (for dusting, optional)
Instructions
- Preheat the oven: Preheat your oven to 320°F (160°C). Line the bottom of an 8-inch round cake pan with parchment paper and lightly grease the sides to ensure easy removal of the cake after baking.
- Prepare the cream cheese mixture: In a medium saucepan, melt the unsalted butter, softened cream cheese, and whole milk together over low heat, stirring until smooth. Remove from heat and stir in vanilla extract. Allow the mixture to cool slightly before proceeding.
- Mix the dry ingredients: In a separate bowl, sift together the all-purpose flour, cornstarch, and salt. Gradually add this dry mix to the cream cheese mixture, stirring continuously until the batter is smooth and free of lumps.
- Prepare the egg yolks: In a large mixing bowl, whisk the separated egg yolks with 1/2 cup granulated sugar until the mixture becomes pale and smooth. Slowly incorporate the yolk mixture into the cream cheese batter, blending thoroughly.
- Whisk the egg whites: Clean your mixing bowl and beat the egg whites with 1/4 cup granulated sugar using an electric mixer at medium speed. Continue beating until soft peaks form, then increase the speed and beat until stiff peaks form, ensuring the whites are firm but not dry.
- Fold the egg whites: Gently fold the beaten egg whites into the batter in batches, using a spatula and a circular folding motion. Be careful to retain the air in the egg whites to maintain a fluffy texture. Mix until fully combined but do not overmix.
- Bake in a water bath: Pour the batter into the prepared cake pan. Tap the pan lightly to release any trapped air bubbles. Place the cake pan inside a larger baking dish, then fill the larger dish with hot water until it reaches halfway up the sides of the cake pan. This water bath will help keep the cake moist and prevent cracking.
- Bake the cake: Bake in the preheated oven for 60-70 minutes, or until the top is golden and the cake is set but still has a slight jiggle in the center. After baking, turn off the oven and leave the cake inside with the door slightly ajar for 15 minutes to cool gradually.
- Cool completely: Remove the cake from the water bath and allow it to cool completely in the pan on a wire rack. Once cooled, refrigerate the cake for at least 3 hours or preferably overnight to let it set fully and develop its delicate texture.
- Serve: Before serving, dust the top of the cake lightly with powdered sugar for an elegant touch. Slice and enjoy this light, fluffy cotton cake chilled.
Notes
- Using the water bath is crucial for preventing cracks and maintaining the cake’s soft texture.
- Ensure egg whites are beaten to stiff peaks for the best rise and fluffiness.
- Separating eggs while cold but bringing them to room temperature before use can yield better volume when whisking.
- The cake can be stored covered in the refrigerator for up to 3 days.
- Optionally, you can flavor the cake with lemon zest or a pinch of matcha powder for variation.
- Prep Time: 25 minutes
- Cook Time: 1 hour 10 minutes
- Category: Dessert
- Method: Baking
- Cuisine: Japanese


