Cannoli Cookie Cups: A Sweet Twist on a Classic Favorite Recipe
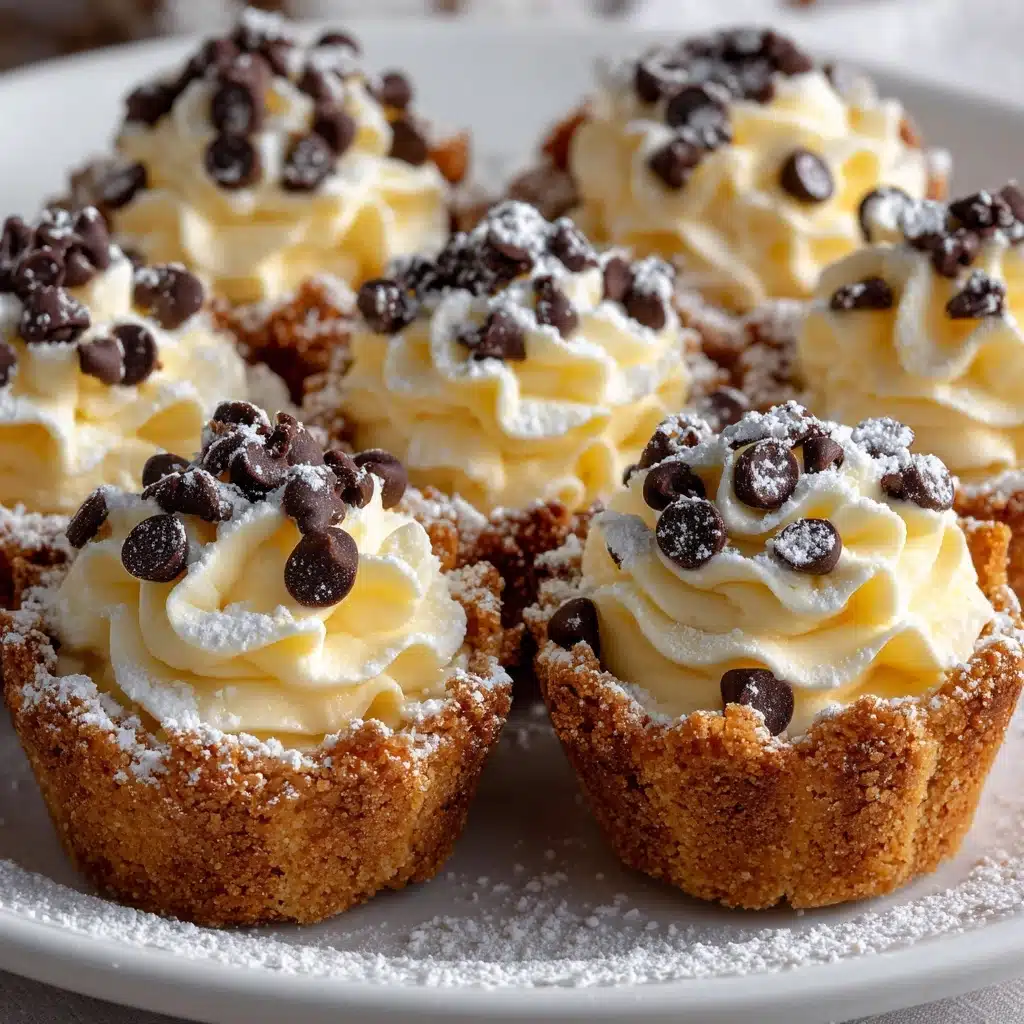
If you’re craving that unforgettable cannoli flavor but want to skip the deep fryer (and impress your friends in the process), Cannoli Cookie Cups: A Sweet Twist on a Classic Favorite are about to become your new go-to dessert! These adorable treats combine the crisp shell of a sugar cookie with the dreamy creamy filling we all love, all bundled up in a bite-sized package. Perfect for gatherings, holidays, or just when you need something extra special, this recipe transforms a traditional Italian classic into a fun, easy-to-make dessert you’ll find yourself baking again and again.
Ingredients You’ll Need
Gathering the right ingredients is key to nailing this recipe! Each one has a special role to play, bringing texture, color, and big Italian-inspired flavor to your Cannoli Cookie Cups: A Sweet Twist on a Classic Favorite. Let’s break down why they matter.
- Sugar Cookie Dough: This is your shortcut to a crisp, sweet shell that perfectly holds our luscious filling and bakes up golden every time.
- Ricotta Cheese (drained): The heart and soul of the cannoli filling—make sure it’s well-drained for that creamy, rich texture.
- Mascarpone Cheese: Adds Italian decadence and a dreamy, velvety finish to your filling, making it smooth and slightly tangy.
- Powdered Sugar: Sweetens and helps bind the filling, dissolving easily for the silkiest result.
- Vanilla Extract: Brings a warm, aromatic depth that elevates the whole dessert.
- Cinnamon: Just a hint of spice brings out the ricotta’s natural sweetness and channels classic cannoli vibes.
- Mini Chocolate Chips: That signature speckled look and a pop of chocolate in every bite—these little chips are essential.
- Chopped Pistachios (optional): For a nutty crunch and lovely color on top, pistachios take your cookie cups to the next level.
- Powdered Sugar (for dusting): A classic finishing touch that makes your desserts look as good as they taste.
How to Make Cannoli Cookie Cups: A Sweet Twist on a Classic Favorite
Step 1: Prep Your Muffin Tin and Preheat That Oven
Start by preheating your oven to 350°F and giving your mini muffin tin a good coating of nonstick spray. This helps the cookie cups pop right out later, so you’re not left wrestling with the pan. A little prep now makes things much easier (and prettier!) in the end.
Step 2: Shape the Cookie Cups
Open up your package of refrigerated sugar cookie dough and cut it into 24 even pieces. Press each piece into the bottom and up the sides of your muffin cups, making sure you’ve shaped a neat little shell. It’s surprisingly fun, and kids will love to help with this part! Each dough cup should look like a tiny bowl that’s ready to be filled.
Step 3: Bake Until Golden
Slide your pan into the oven and bake the shells for 10 to 12 minutes, or until they’re lightly golden and just set. The cookies will puff a little, and that’s exactly what you want! When they come out, immediately grab the back of a spoon and gently press down the centers to re-shape the wells—this is what gives you that classic cannoli cup for the filling later.
Step 4: Cool Completely
Patience pays off here! Let your cookie cups cool completely in the pan. This helps them firm up and hold their shape when you take them out—and trust me, you don’t want a warm cookie cup to collapse at the finish line.
Step 5: Mix Up the Creamy Cannoli Filling
While the shells cool, it’s time to whip up that iconic filling. In a medium bowl, beat together the drained ricotta, mascarpone cheese, powdered sugar, vanilla, and cinnamon until the mixture is smooth and luscious. When that’s ready, fold in your mini chocolate chips. The filling should be creamy but thick enough to pipe or spoon into your cups without running.
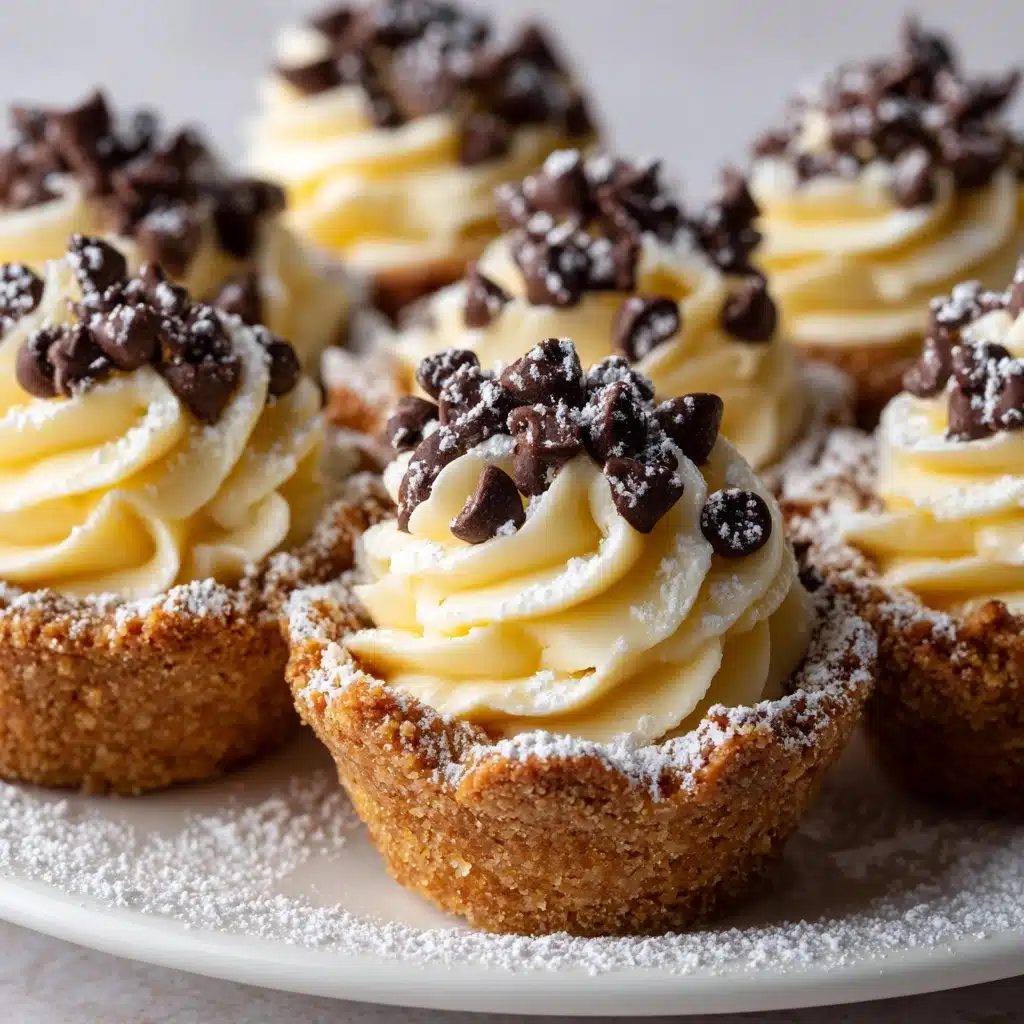
Step 6: Assemble Cannoli Cookie Cups: A Sweet Twist on a Classic Favorite
Once your shells are completely cool, carefully remove them from the pan. Now the fun part—either pipe or spoon your dreamy filling right into each cookie cup, mounding it slightly for extra flair. Don’t forget to garnish with a scatter of chopped pistachios and a shower of powdered sugar for that bakery-style finish!
How to Serve Cannoli Cookie Cups: A Sweet Twist on a Classic Favorite
Garnishes
The finishing touch is what truly sets these apart! Go classic with a light dusting of powdered sugar and a sprinkle of pistachios for crunch and bold color. You can also add a few extra mini chocolate chips for extra chocolatey goodness, or try citrus zest for a pop of brightness.
Side Dishes
Pair your Cannoli Cookie Cups: A Sweet Twist on a Classic Favorite with espresso, cappuccino, or even a sweet dessert wine for a full Italian-inspired experience. A fruit platter with berries or citrus wedges would add freshness and balance to your dessert spread.
Creative Ways to Present
Arrange the cookie cups on a tiered platter for a party-perfect centerpiece, or gift them in bakery boxes tied with ribbon for an unforgettable homemade treat. For special occasions, nestle each cup in a colorful cupcake liner and display on a pretty tray—guests will love the presentation as much as the taste!
Make Ahead and Storage
Storing Leftovers
If you end up with extra Cannoli Cookie Cups: A Sweet Twist on a Classic Favorite, keep them crisp by storing the cookie cups and filling separately in airtight containers in the fridge. Assemble just before serving, and they’ll maintain their delicious texture and flavor.
Freezing
You can freeze the baked, unfilled cookie cups for up to one month. Place them in a single layer with parchment between, and thaw at room temperature when ready to use. The filling is best made fresh and not frozen, to keep its creamy consistency.
Reheating
If your cookie cups need a little freshening, pop them in a 300°F oven for a couple of minutes to regain their crispness before filling. There’s no need to reheat the filling—just let it come to room temperature, then pipe or spoon into your cooled cups.
FAQs
Can I substitute the sugar cookie dough with homemade dough?
Absolutely! If you have a favorite homemade sugar cookie dough, go for it. Just be sure to chill it thoroughly so it holds shape in the muffin tin.
How do I prevent the cookie cups from sticking to the pan?
Generously grease the mini muffin tin, and if you want extra insurance, you can use mini muffin liners. Letting the cups cool completely before removing also helps them come out easily.
Can I make the filling ahead of time?
Yes! The filling for Cannoli Cookie Cups: A Sweet Twist on a Classic Favorite can be mixed a day in advance. Just cover and refrigerate it until you’re ready to fill the cups—this even helps the flavors meld.
What’s the best way to drain ricotta?
Spoon the ricotta onto a few layers of paper towel or cheesecloth, then wrap and gently press to release any excess liquid. Let it sit for 15-30 minutes for best results. This ensures a thick, creamy filling that won’t be runny.
Can I customize the fillings or toppings?
Definitely! Try adding orange zest, swapping in chopped candied fruit, or using white chocolate chips for a twist. The garnishes are wide open—think dried fruit, a drizzle of chocolate, or even toasted coconut for a unique spin.
Final Thoughts
There’s just something irresistible about Cannoli Cookie Cups: A Sweet Twist on a Classic Favorite—they deliver big Italian flavor in a hand-held treat that’s guaranteed to wow a crowd (or just make your own day a little sweeter!). Give them a try, and you’ll see how easy and fun it is to bring a bakery-worthy dessert into your kitchen, one bite-sized masterpiece at a time.
Print
Cannoli Cookie Cups: A Sweet Twist on a Classic Favorite Recipe
- Total Time: 32 minutes
- Yield: 24 cookie cups 1x
- Diet: Vegetarian
Description
Indulge in the delightful marriage of cannoli and cookie with these scrumptious Cannoli Cookie Cups. A fusion of sweet, creamy filling nestled in a crispy cookie shell, these treats are a perfect blend of flavors and textures.
Ingredients
For the Cookie Cups:
- 1 roll (16 oz) refrigerated sugar cookie dough
For the Filling:
- 1 1/2 cups ricotta cheese, drained
- 1/2 cup mascarpone cheese
- 1/2 cup powdered sugar
- 1 teaspoon vanilla extract
- 1/2 teaspoon cinnamon
- 1/2 cup mini chocolate chips
- 1/4 cup chopped pistachios, optional
For Garnish:
- Powdered sugar for dusting
Instructions
- Preheat Oven: Preheat oven to 350°F. Grease a 24-cup mini muffin tin.
- Prepare Cookie Cups: Cut cookie dough into 24 equal pieces and press each piece into the bottom and sides of the muffin cups to form a small shell. Bake for 10–12 minutes until lightly golden. Remove from oven and press the center of each cup down with a spoon to form a well. Let cool completely.
- Make Filling: Beat ricotta, mascarpone, powdered sugar, vanilla, and cinnamon until smooth. Fold in chocolate chips. Fill cooled cookie cups with the mixture.
- Garnish and Serve: Garnish with chopped pistachios and powdered sugar before serving.
Notes
- For best results, fill the cookie cups just before serving to maintain their crispness.
- The filling can be prepared a day ahead and refrigerated.
- Prep Time: 20 minutes
- Cook Time: 12 minutes
- Category: Dessert, Cookies
- Method: Baking
- Cuisine: Italian-American
Nutrition
- Serving Size: 1 cookie cup
- Calories: 160
- Sugar: 13 g
- Sodium: 90 mg
- Fat: 8 g
- Saturated Fat: 4 g
- Unsaturated Fat: 3 g
- Trans Fat: 0 g
- Carbohydrates: 18 g
- Fiber: 0 g
- Protein: 3 g
- Cholesterol: 15 mg


