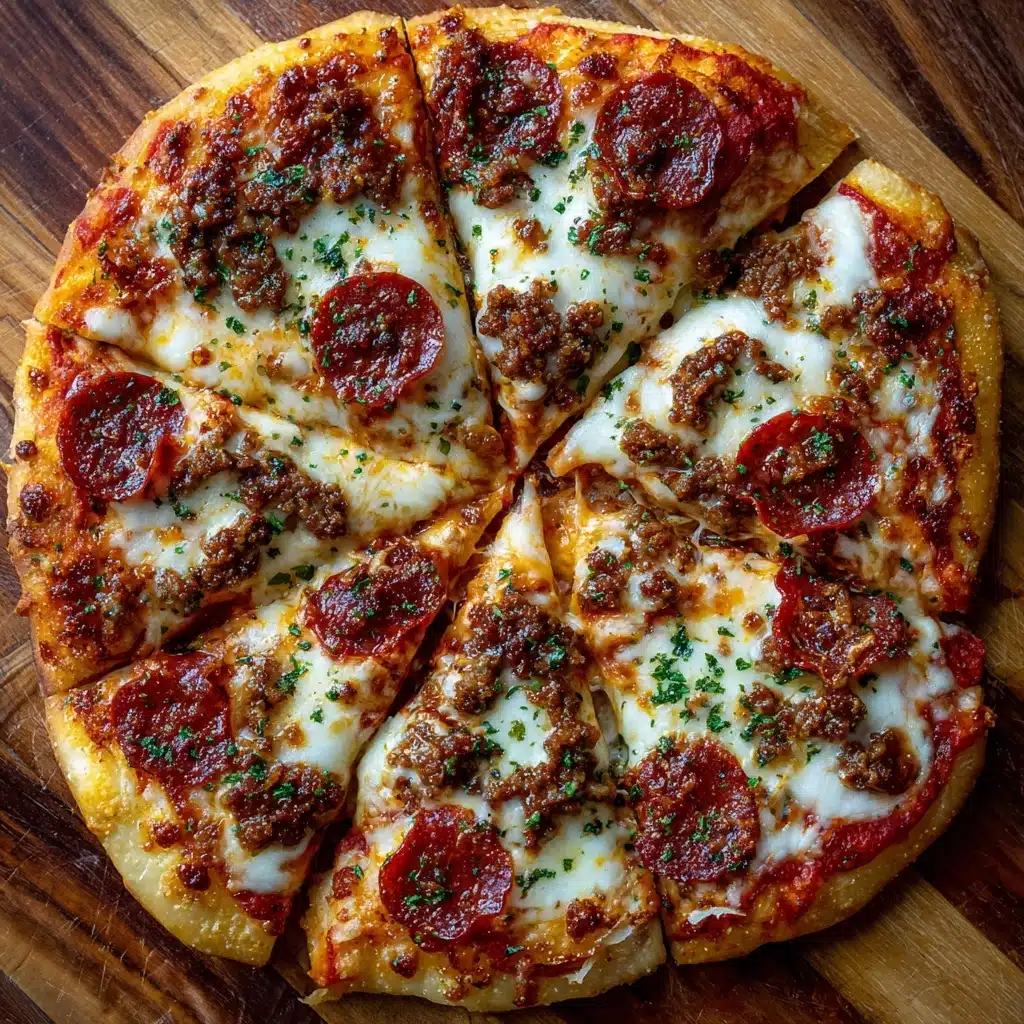
Lunch Lady Pizza Recipe
If you’re craving a slice of pure nostalgia, look no further than Lunch Lady Pizza. This beloved recipe instantly transports you back to those golden days in the school cafeteria, where the aroma of bubbling cheese and fresh-baked dough promised a lunch break worth celebrating. With its signature rectangular shape, chewy crust, and a gooey blend of cheeses, this pizza strikes the perfect balance between comfort and flavor. Whether you’re making it for family, friends, or just to relive your favorite childhood lunch, this homemade Lunch Lady Pizza guarantees smiles all around.
Ingredients You’ll Need
The magic of Lunch Lady Pizza is in its simplicity. Each ingredient plays a crucial role, from the soft, pillowy crust to the melty cheese topping. Gather these staples and you’re halfway to a pizza that’s as fun to make as it is to eat.
- Active dry yeast: Gives the dough its lift and light, chewy texture.
- Warm water (110°F): The perfect temperature to activate your yeast for a fluffy rise.
- Sugar: Feeds the yeast and adds a hint of sweetness to the dough.
- All-purpose flour: The foundation of a sturdy but soft crust.
- Salt: Enhances the flavor and balances the other ingredients.
- Olive oil: Adds richness and helps the crust bake up golden and crisp on the edges.
- Pizza sauce: A tangy, savory layer that brings moisture and classic pizza flavor.
- Shredded mozzarella cheese: Melts beautifully for that iconic stretchy cheese pull.
- Shredded cheddar cheese: Adds sharpness and a pop of color to the cheese blend.
- Grated Parmesan cheese: Delivers a nutty, salty punch that ties everything together.
- Dried oregano: Sprinkled on top for an herby, aromatic finish.
- Optional toppings: Pepperoni, diced green peppers, or mushrooms for classic cafeteria flair.
How to Make Lunch Lady Pizza
Step 1: Activate the Yeast
Start by mixing the warm water, sugar, and yeast in a large bowl. Give it a gentle stir and let it sit for 5 to 10 minutes. You’re looking for a foamy top, which means your yeast is alive and ready to work its magic. This is the secret to that soft, airy crust you remember from Lunch Lady Pizza.
Step 2: Make the Dough
Once the yeast is bubbly, add in the olive oil, salt, and flour. Mix everything together until a shaggy dough forms, then turn it out onto a floured surface. Knead for 5 to 7 minutes, working the dough until it’s smooth, elastic, and a little tacky but not sticky. This step is therapeutic and really pays off in the final bite!
Step 3: Let the Dough Rise
Place your dough into a greased bowl, cover with a kitchen towel, and tuck it somewhere warm. Let it rise for 30 to 45 minutes, or until it’s doubled in size. Watching the dough puff up is always a satisfying sight, and it ensures your Lunch Lady Pizza has that signature thickness.
Step 4: Shape and Top the Pizza
Preheat your oven to a piping hot 475°F (245°C). Roll the dough out into a rectangle to fit a greased 9×13-inch baking sheet—no need to be a perfectionist! Press the dough evenly into the pan, forming a little edge around the border. Spread the pizza sauce all over, then layer on the mozzarella, cheddar, and Parmesan cheeses. Sprinkle with oregano and add any favorite toppings for a personalized touch.
Step 5: Bake to Golden Perfection
Slide the pan into your preheated oven and bake for 12 to 15 minutes. When the crust is golden and the cheese is melted and bubbly, your Lunch Lady Pizza is ready! Let it cool for a few minutes before slicing into those iconic rectangles.
How to Serve Lunch Lady Pizza

Garnishes
A sprinkle of extra Parmesan or a dash of crushed red pepper adds a grown-up twist, while fresh chopped parsley gives your Lunch Lady Pizza a pop of color. If you want to keep it truly nostalgic, serve it just as it is—hot and gooey, straight from the pan!
Side Dishes
Pair your pizza with a classic Caesar salad, crunchy carrot sticks, or a side of fruit for a school-lunch-inspired meal. For that authentic cafeteria vibe, don’t forget an ice-cold carton of milk or a nostalgic juice box.
Creative Ways to Present
Go retro by cutting your Lunch Lady Pizza into perfect rectangles and serving on vintage cafeteria trays. Hosting a party? Set up a DIY pizza bar with bowls of toppings so everyone can create their own version. You can even pack leftovers in lunchboxes for an extra-special midday treat.
Make Ahead and Storage
Storing Leftovers
If you have any slices left (which is rare!), wrap them well and refrigerate for up to 3 days. The crust stays surprisingly soft, and the flavors meld even more overnight.
Freezing
Lunch Lady Pizza freezes beautifully. Cool the slices completely before wrapping them tightly in foil or plastic wrap, then pop them in a freezer bag. They’ll keep for up to two months, perfect for quick lunches or busy weeknights.
Reheating
For best results, reheat slices in a 350°F oven for about 10 minutes. This keeps the crust crisp and the cheese melty. In a hurry? A quick zap in the microwave works too, but the oven method is worth the extra time for maximum yum.
FAQs
Can I use store-bought pizza dough for Lunch Lady Pizza?
Absolutely! If you’re short on time, a good quality store-bought dough is a fantastic shortcut. The homemade dough adds that nostalgic touch, but you’ll still get delicious results either way.
What’s the best cheese blend for Lunch Lady Pizza?
The classic combo is mozzarella, cheddar, and Parmesan, but don’t be afraid to experiment! For extra nostalgia, try including a bit of American cheese for that creamy, melt-in-your-mouth effect.
Can I make Lunch Lady Pizza gluten-free?
Yes! Use your favorite gluten-free flour blend and check that your yeast and toppings are gluten-free. The texture will be a little different, but the flavors will still hit all the right notes.
What other toppings work well on Lunch Lady Pizza?
Pepperoni, diced bell peppers, mushrooms, or even olives are all classic choices. Feel free to get creative—this pizza is all about making it your own!
Is it okay to prep the dough ahead of time?
Definitely. You can prepare the dough the night before and let it rise slowly in the fridge. Just bring it to room temperature before shaping and baking for the best texture.
Final Thoughts
There’s just something special about recreating a childhood favorite like Lunch Lady Pizza in your own kitchen. It’s cozy, fun, and guaranteed to make any meal feel like a celebration. Give it a try and let yourself enjoy every cheesy, nostalgic bite—you’ll be glad you did!
Print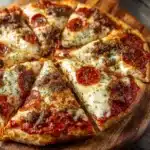
Lunch Lady Pizza Recipe
- Total Time: 50 to 65 minutes (includes 30–45 minutes rise time)
- Yield: 6 servings 1x
- Diet: Non-Vegetarian
Description
Lunch Lady Pizza is a nostalgic homemade recipe inspired by classic school cafeteria pizza. Featuring a soft, rectangular crust topped with a blend of mozzarella, cheddar, and Parmesan cheeses along with a flavorful pizza sauce and optional toppings, this easy-to-make pizza brings back vintage school lunch memories with every bite.
Ingredients
For the Dough
- 1 packet (2¼ teaspoons) active dry yeast
- 1 cup warm water (110°F)
- 1 tablespoon sugar
- 2½ cups all-purpose flour
- 1 teaspoon salt
- 1 tablespoon olive oil
For the Toppings
- 1 cup pizza sauce
- 2 cups shredded mozzarella cheese
- 1 cup shredded cheddar cheese
- ½ cup grated Parmesan cheese
- 1 teaspoon dried oregano
- Optional toppings: sliced pepperoni, diced green peppers, or mushrooms
Instructions
- Activate the Yeast: In a mixing bowl, combine the warm water, sugar, and active dry yeast. Let it sit for 5–10 minutes until the mixture becomes foamy, indicating the yeast is active and ready to use.
- Prepare the Dough: Stir in the olive oil, salt, and all-purpose flour into the yeast mixture. Mix until a dough forms, then transfer it to a floured surface and knead for 5–7 minutes until the dough is smooth and elastic.
- Let the Dough Rise: Place the kneaded dough into a greased bowl and cover it. Allow it to rise in a warm area for 30–45 minutes, or until it doubles in size, which develops the dough’s texture and flavor.
- Preheat the Oven: Set your oven to 475°F (245°C) to prepare for baking the pizza at a high temperature, ensuring a crisp crust and melted cheese.
- Shape the Dough: Roll out the risen dough into a rectangular shape to fit a greased 9×13-inch baking sheet. Press the dough evenly into the pan, forming a slight raised edge around the border to hold in toppings.
- Add Sauce and Toppings: Spread the pizza sauce evenly over the dough. Sprinkle the shredded mozzarella, cheddar, and grated Parmesan cheeses on top. Then, sprinkle dried oregano over the cheese and add any optional toppings such as sliced pepperoni, diced green peppers, or mushrooms.
- Bake the Pizza: Place the baking sheet in the preheated oven and bake for 12–15 minutes, or until the crust turns golden brown and the cheese is melted and bubbly.
- Cool and Serve: Remove the pizza from the oven and let it cool slightly for a few minutes. Slice into squares and serve warm for a delicious, comforting meal.
Notes
- For an even more nostalgic flavor, use a blend of American and cheddar cheeses to replicate classic cafeteria pizza taste.
- You can prepare the dough ahead of time and refrigerate it overnight to save time on the day you plan to bake.
- This recipe is easily doubled to serve a larger crowd or for meal prepping.
- Prep Time: 20 minutes
- Cook Time: 15 minutes
- Category: Main Course
- Method: Baking
- Cuisine: American
Nutrition
- Serving Size: 1 slice
- Calories: 390
- Sugar: 4g
- Sodium: 620mg
- Fat: 18g
- Saturated Fat: 9g
- Unsaturated Fat: 7g
- Trans Fat: 0g
- Carbohydrates: 40g
- Fiber: 2g
- Protein: 16g
- Cholesterol: 35mg


