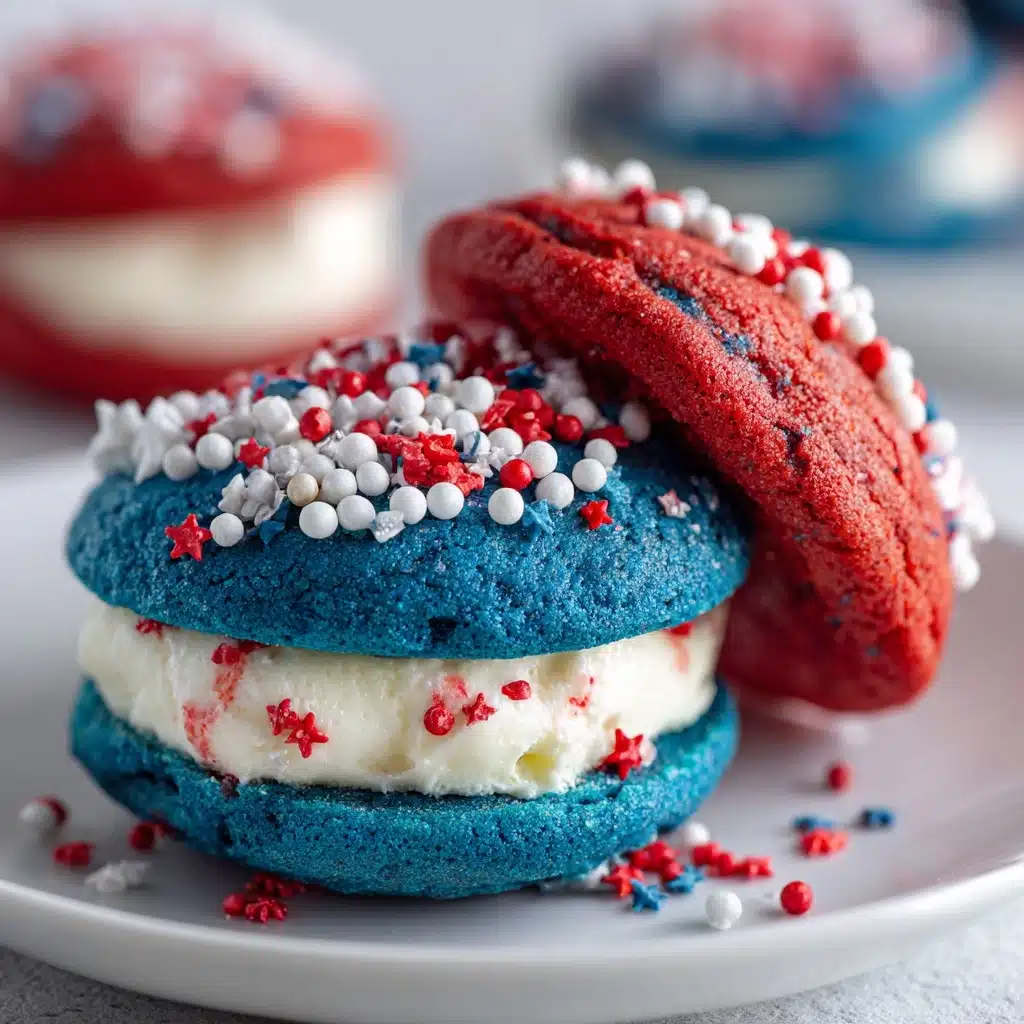
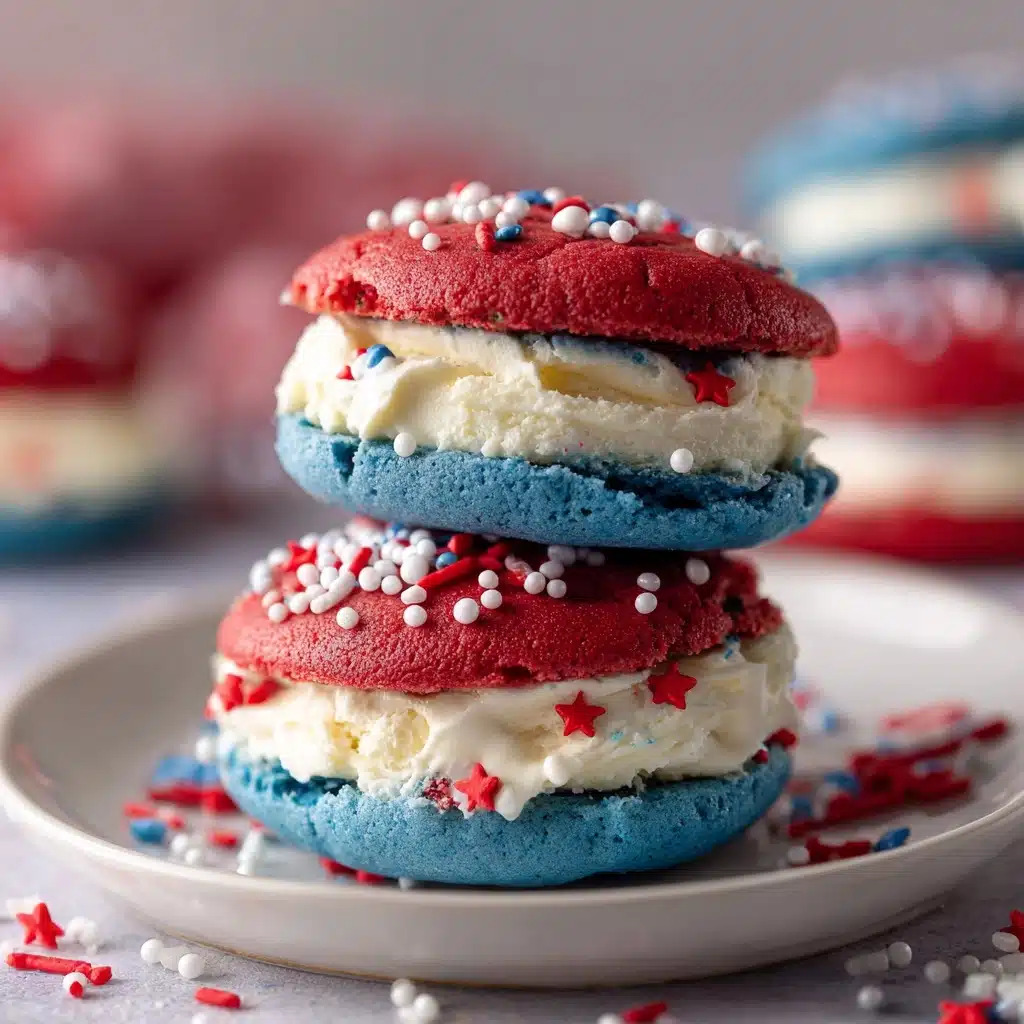
Red, White and Blue Whoopie Pies Recipe
If there’s ever a dessert that knows how to get a party started, it’s this Red, White and Blue Whoopie Pies Recipe. These celebratory treats are bold, fun, and full of nostalgic flavor thanks to pillowy-soft cocoa cakes and a cloud of fluffy marshmallow filling. Whether you’re planning a 4th of July picnic, a summer birthday bash, or just craving a sweet pick-me-up, this recipe puts the spirit of celebration right in your hands with every colorful bite.
Ingredients You’ll Need
Making the Red, White and Blue Whoopie Pies Recipe is refreshingly simple, yet each ingredient plays a starring role in the final result. From the rich cocoa that makes the cakes irresistibly chocolatey to the marshmallow creme that gives the filling its signature fluff, you’re about to create a dessert that’s joyful in both flavor and color.
- All-purpose flour: The backbone of the cakes, ensuring a soft yet sturdy texture that holds up perfectly to the filling.
- Unsweetened cocoa powder: Gives each cake that signature chocolate flavor—look for a good quality powder for rich depth.
- Baking soda: Keeps the cakes light and tender, letting them puff up just the right amount.
- Salt: Brings all the flavors into balance and enhances the chocolate.
- Buttermilk: Adds moisture and a gentle tang that makes the cakes extra tender.
- Vanilla extract: Rounds out the flavors in both the cakes and the creamy filling.
- Unsalted butter (softened): The secret to both a luscious filling and a tender cake crumb.
- Granulated sugar: Adds just the right amount of sweetness to each bite.
- Large egg: Binds everything together and helps the cakes rise beautifully.
- Red and blue gel food coloring: Essential for getting those vibrant, patriotic hues—gel offers the boldest colors without thinning the batter.
- Powdered sugar: Works with butter and marshmallow creme to create the cloud-like filling.
- Marshmallow creme: The classic whoopie pie filling ingredient, lending that irresistible fluffiness.
- Red and blue sprinkles: A festive finishing touch that adds crunch and sparkle to every sandwich.
How to Make Red, White and Blue Whoopie Pies Recipe
Step 1: Preheat and Prep
Begin by preheating your oven to 350°F. Line two baking sheets with parchment paper—this makes cleanup a breeze and ensures your cakes won’t stick, keeping those colors crisp and clean. Taking a few moments now sets you up for a stress-free baking experience.
Step 2: Whisk the Dry Ingredients
Grab a medium bowl and whisk together the flour, cocoa powder, baking soda, and salt. This step is key for evenly distributing the leavening and cocoa so every whoopie pie bakes up cakey and chocolatey—not one bite more than the other.
Step 3: Cream the Butter and Sugar
In a large mixing bowl, beat the softened butter and granulated sugar until the mixture is light and fluffy. This process is where you build structure and airiness into your cakes, so don’t rush it! Once fluffy, add the egg and vanilla, mixing until everything is smooth and combined.
Step 4: Combine the Wet and Dry Ingredients
Alternate adding your dry mix and the buttermilk into the butter mixture, beginning and ending with the dry ingredients. This helps keep the batter smooth and gives a tender crumb. Be careful to mix only until combined—overmixing can make your cakes tough.
Step 5: Divide and Color the Batter
Separate the batter into three bowls. Tint one bowl with red gel food coloring and another with blue; leave the third plain to let the ‘white’ shine through. Gel food colorings are best for vivid patriotic colors without making the batter too runny.
Step 6: Shape and Bake the Cakes
Drop heaping tablespoons of each colored batter onto your prepared baking sheets, spacing them about 2 inches apart. Play around with the red, white, and blue to create a variety of combos! Bake in the preheated oven for 10–12 minutes, until the cakes spring back when gently pressed.
Step 7: Cool Completely
Once baked, transfer the cakes to a wire rack to cool completely. This step is essential—filling warm cakes can lead to melting filling and drippy sandwiches (although, honestly, still delicious if you can’t wait!). Patience here makes for perfect pies.
Step 8: Make the Filling
While the cakes cool, create the dreamy filling by beating together the softened butter, powdered sugar, marshmallow creme, and vanilla extract. Whip until light, smooth, and beautifully fluffy—this is the heart of any whoopie pie.
Step 9: Assemble and Decorate
Spread or pipe a generous dollop of filling onto the flat side of one cake, then sandwich it with another. If you’re feeling festive (who isn’t?), roll the edges in red and blue sprinkles to finish your Red, White and Blue Whoopie Pies Recipe with a sparkly crunch.
How to Serve Red, White and Blue Whoopie Pies Recipe
Garnishes
To make these treats pop even more, try sprinkling extra red and blue sprinkles around the serving platter or lightly dust with a little powdered sugar for a snow-dusted effect. For maximum wow-factor, a drizzle of melted white chocolate or a few strategically placed edible stars really shows off the festive flair of your Red, White and Blue Whoopie Pies Recipe.
Side Dishes
While these whoopie pies can totally steal the show on their own, they pair beautifully with a bowl of fresh summer berries, a scoop of vanilla ice cream, or even a cool glass of lemonade. The tartness and freshness balance out the rich filling and chocolatey cakes, making your dessert spread extra inviting.
Creative Ways to Present
Pile them high on a tiered dessert tray for a patriotic centerpiece, or nestle each whoopie pie in its own cupcake wrapper for clean grabbing at a picnic or barbecue. If you want to get really creative, pipe little flags or stars on top using colorful royal icing! The Red, White and Blue Whoopie Pies Recipe thrives with a creative twist, so have fun with your presentation.
Make Ahead and Storage
Storing Leftovers
To keep your Red, White and Blue Whoopie Pies Recipe tasting fresh, store assembled pies in an airtight container in the refrigerator. They’ll stay soft and moist for up to three days—just let them come to room temperature for the best texture before serving.
Freezing
If you want to get ahead for party prep, you can freeze the baked (and cooled) cakes alone or even assembled whoopie pies (without sprinkles). Wrap individually in plastic wrap and then seal in a freezer-safe bag or container. They’ll keep beautifully for a month; just thaw overnight in the fridge when you’re ready.
Reheating
There’s no need to actually reheat whoopie pies, but if you prefer a slightly softer bite, let chilled pies sit at room temperature for 15–20 minutes. Avoid microwaving, as the filling can melt too quickly. Serve and enjoy as soon as they’re perfectly tender.
FAQs
Can I make this Red, White and Blue Whoopie Pies Recipe gluten-free?
Yes, you can swap in a 1:1 gluten-free flour blend for the all-purpose flour. Just keep an eye on the texture and don’t overmix, as gluten-free batters can become gummy if stirred too much.
Can I use natural food coloring instead of gel?
You can, but gel food coloring gives you those vibrant red and blue hues without adding extra moisture, which could affect the texture of your cakes. If you do use natural coloring, start with small amounts and adjust as needed.
Should I chill the filling before assembling?
If your kitchen is warm or the filling seems extra soft, a quick 10–15 minute chill in the fridge can help the marshmallow filling hold its shape better when you’re sandwiching the cakes.
Can I double the Red, White and Blue Whoopie Pies Recipe for a larger crowd?
Absolutely! This recipe scales up easily. Just be sure to bake the cakes in batches so they spread and bake evenly. It’s a great way to make sure there’s enough festive dessert for everyone at your celebration.
What’s the best way to transport whoopie pies?
Transport in shallow containers, with layers separated by parchment or wax paper to prevent sticking and smudging. Chill them before moving and add sprinkles just before serving for the freshest look.
Final Thoughts
If you’re looking to make any gathering instantly more festive (and delicious), give the Red, White and Blue Whoopie Pies Recipe a place on your dessert table. The combination of pillowy chocolate cakes, marshmallow cloud filling, and splashy colors makes for smiles all around. Don’t be surprised if they disappear faster than fireworks at dusk!
Print
Red, White and Blue Whoopie Pies Recipe
- Total Time: 37 minutes
- Yield: 12 whoopie pies 1x
- Diet: Vegetarian
Description
Celebrate any patriotic occasion with these Red, White, and Blue Whoopie Pies! These delightful treats are not only visually appealing but also incredibly delicious. Soft, cake-like cookies filled with a fluffy, sweet filling, these whoopie pies are perfect for 4th of July, Memorial Day, or any festive gathering.
Ingredients
Dry Ingredients:
- 2 cups all-purpose flour
- 1/2 cup unsweetened cocoa powder
- 1 1/4 teaspoons baking soda
- 1/2 teaspoon salt
Wet Ingredients:
- 1 cup buttermilk
- 1 teaspoon vanilla extract
- 1/2 cup unsalted butter (softened)
- 1 cup granulated sugar
- 1 large egg
- Red and blue gel food coloring
For the Filling:
- 1 cup unsalted butter (softened)
- 2 cups powdered sugar
- 1 jar (7 ounces) marshmallow creme
- 1 teaspoon vanilla extract
- Red and blue sprinkles for decoration
Instructions
- Preheat the oven: Preheat the oven to 350°F and line two baking sheets with parchment paper.
- Mix dry ingredients: In a medium bowl, whisk together the flour, cocoa powder, baking soda, and salt.
- Cream butter and sugar: In a separate bowl, beat the butter and sugar until light and fluffy.
- Add wet ingredients: Mix in the egg and vanilla extract.
- Combine ingredients: Alternate adding the dry ingredients and buttermilk to the butter mixture.
- Tint the batter: Divide the batter into three bowls and tint one red, one blue, and leave one plain.
- Bake: Drop spoonfuls of batter onto baking sheets and bake for 10-12 minutes.
- Make the filling: Beat together butter, powdered sugar, marshmallow creme, and vanilla.
- Assemble: Spread filling on one cake and sandwich with another. Decorate with sprinkles.
Notes
- Chill assembled whoopie pies for 30 minutes before serving for easier handling.
- Store in an airtight container in the refrigerator for up to 3 days.
- Prep Time: 25 minutes
- Cook Time: 12 minutes
- Category: Dessert
- Method: Baking
- Cuisine: American
Nutrition
- Serving Size: 1 whoopie pie
- Calories: 370
- Sugar: 34 g
- Sodium: 210 mg
- Fat: 16 g
- Saturated Fat: 10 g
- Unsaturated Fat: 5 g
- Trans Fat: 0 g
- Carbohydrates: 55 g
- Fiber: 2 g
- Protein: 4 g
- Cholesterol: 55 mg


